If you want to play with some bigger large language models (LLMs) but you’re not ready to spend thousands of dollars on your own rig, one option is to rent a GPU from a place like DigitalOcean. In this article, I’ll walk you through doing that. For this project, we’ll be using:
We’re also going to use:
There are a number of places you can rent a virtual machine with a GPU, but DigitalOcean is the cloud provider I found to be the easiest and most cost-effective for small-scale use cases. DigitalOcean’s VMs are called “droplets.” First, you have to request access to GPU droplets, as I guess they don’t rent them to just anyone.
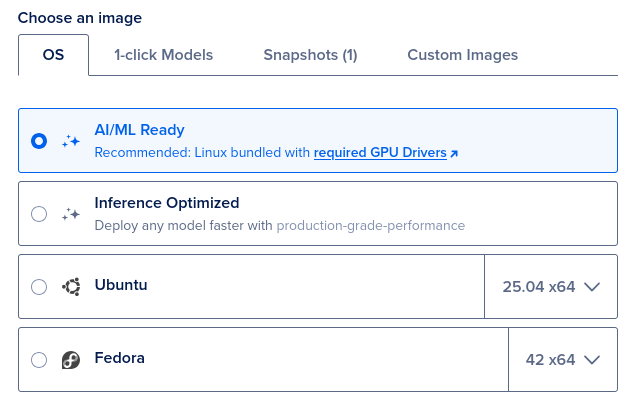
Then, select the OS. I’m using the one that comes pre-loaded with all the drivers needed to run a GPU:
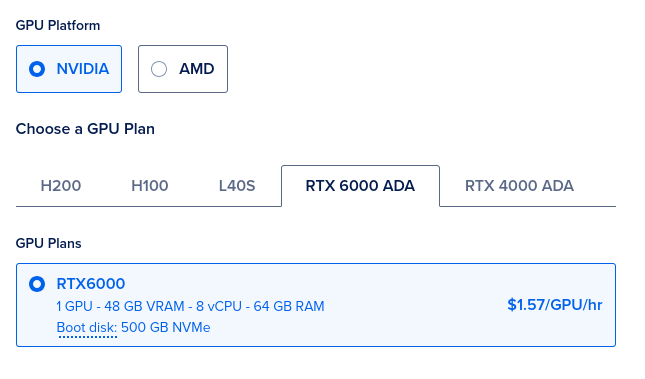
Pick your machine. This will depend on which model you’ll be running.
Since it’s just for a single user, the only criteria is a GPU with
enough VRAM to fit the entire model. We want to run
llama3.3:70b, which is 43gb, so the RTX 6000 with 48gb of
VRAM is enough. As of right now, this droplet is renting for
US$1.57/hr.
The last thing you’ll want to do is add an SSH key to make it easy to
access your droplet from a terminal, then pick a name. I’m going with
gpu-inference-droplet because I want it to be easy to
remember. Then hit CREATE!!
Once DigitalOcean has finished creating your droplet, you can copy the droplet’s IP address from the dashboard and use that to SSH into your VM and start setting it up.
$ ssh root@<droplet IP address>The first thing I like to do is install Tailscale. Assuming you already have Tailscale running on your machine, this will put the VM on the same virtual private network and make it much easier and more idiomatic to set up connections. From your shell session, run:
$ curl -fsSL https://tailscale.com/install.sh | sh… and then follow the authentication instructions to add the VM to
your tailnet (if you need more details on how Tailscale works and how to
set up a tailnet, go
here). Now if I want to SSH into the VM, I just do
ssh root@gpu-inference-droplet and I don’t have to worry
about looking up the IP address every time.
Next, you want to install Ollama as the server for our LLMs. Again, pretty straight-forward, just do:
$ curl -fsSL https://ollama.com/install.sh | shPick some models to install from
Ollama’s library. For now, I’m going to go with
llama3.3:70b (43gb), so:
$ ollama pull llama3.3:70bNow everything should be all up and running! Exit your SSH session back to your workstation and run the following to test:
$ curl -v http://gpu-inference-droplet:11434/api/tagsThat should return a list of available models that looks something like this, which means your Ollama server is up and listening and you can reach the endpoint:
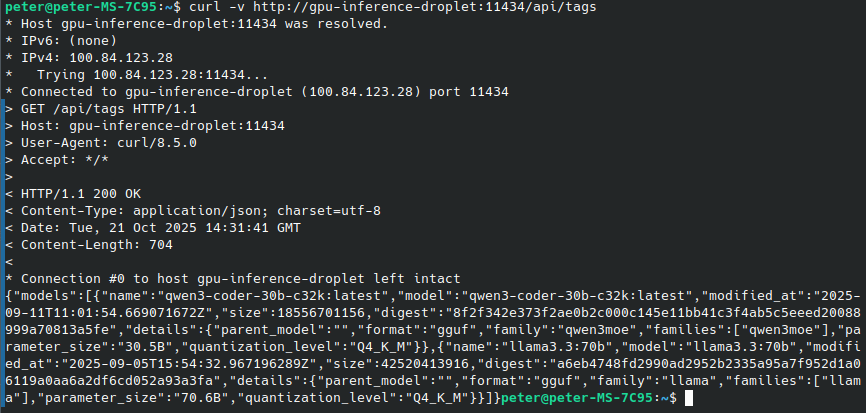
As long as your GPU droplet exists, DigitalOcean is going to charge you for it. So you might want to destroy it when you’re not using it so it doesn’t end up costing you hundreds or thousands of dollars a month. But destroying it means you’d have to re-do all this setup!
Fortunately, there’s a solution.
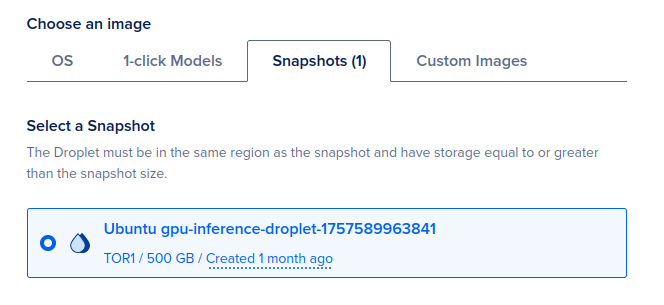
All you have to do is take a snapshot of your GPU droplet. (This can take awhile to save, as it’s a pretty large volume.) Then the next time you want to spin up your GPU for inference, just use the snapshot when you are selecting a machine, and all your settings and downloaded models will be ready to go!
If you want to make it even faster, you can install the DigitalOcean
CLI doctl, and then you can spin up your custom GPU droplet
from a snapshot programmatically in seconds with a single line of bash.
Follow
these instructions to install doctl and
authenticate.
Then you can run a command that looks like this:
$ doctl compute droplet create gpu-inference-droplet \
--image 000000000 \
--size gpu-6000adax1-48gb \
--region tor1 \
--vpc-uuid <your UUID here> \
--tag-names '' \
--ssh-keys '0000000'
This command has a few variables you’ll need to collect to build it.
First, you can name the droplet whatever you want. I’m naming mine
gpu-inference-droplet to keep it consistent. Next, the
--image variable should be the 9-digit ID number of the
snapshot you saved of your droplet. To find it, run:
$ doctl compute image list --public --format ID,Name,Slug,Type | grep "snapshot".. then copy the first number on the left. The --size
flag is whatever GPU droplet you’re using. To see a list of options,
run:
$ doctl compute size list | grep "gpu"For --region, I use tor1 because GPU
droplets aren’t available in all regions, and as of this writing, the
Toronto datacenter seems to have the most options. Next, for
--vpc-uuid, enter your DigitalOcean unique user ID. You can
find that by running $ doctl account get.
You can use --tag to tag your droplet whatever you want.
Lastly, to add an SSH key to your droplet, use the
--ssh-keys flag with the ID number of an SSH key you’ve
added to your DigitalOcean account. To see a list of your SSH keys,
run:
$ doctl compute ssh-key listAfter you spin up your droplet, check its health to make sure everything is running:
$ doctl compute droplet listThen when you’re done using your LLM, be sure to destroy the droplet with:
$ doctl compute droplet delete gpu-inference-dropletSave these commands to a text file somewhere, then anytime you want to spin up your own, private, powerful LLM, copy/paste into the terminal and you’re up and running in seconds!
Setting up an Ollama server is neat, but to make it useful, you have to have some kind of front end that handles the API responses. There’s lots of options out there, but here I’ll discuss two: Open WebUI and Kilo Code.
The first is Open WebUI, which provides a basic ChatGPT-style interface. Installing it is beyond the scope if this piece, but you can go here for instructions. Once you have it running, open the settings and click on Connections. This is where you can add/remove endpoints for your LLM server.
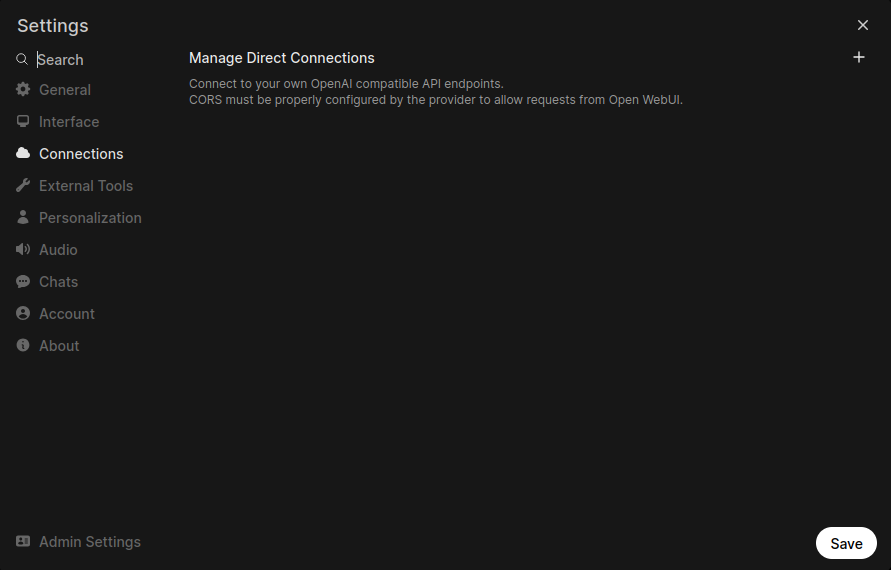
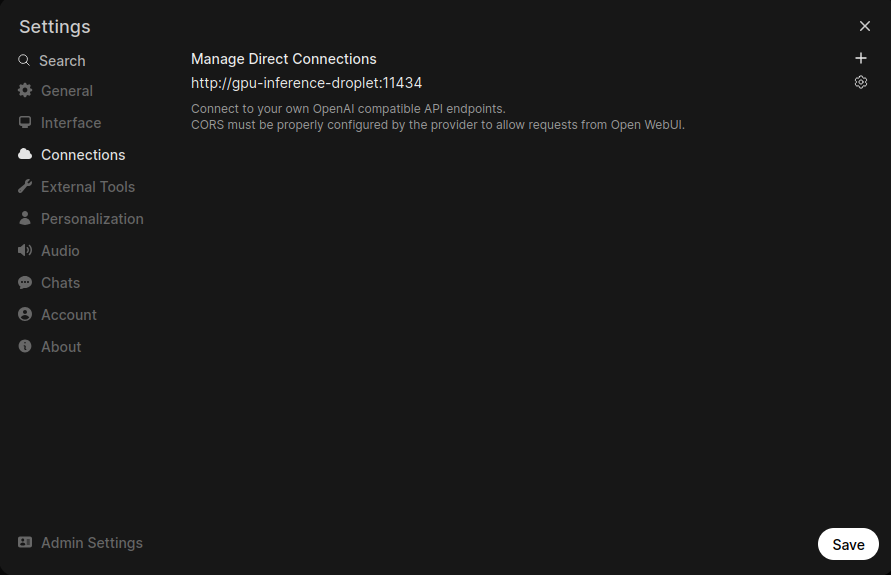
Click on the little plus symbol, and add the following to add your Ollama server (11434 is the default port used by Ollama):

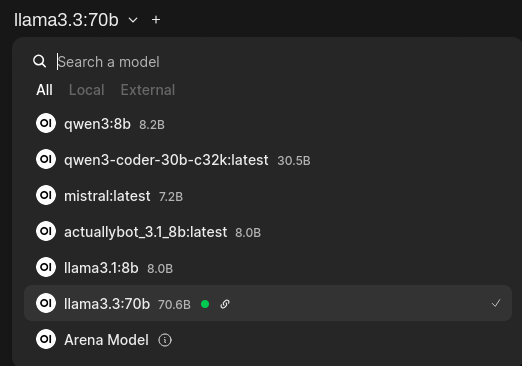
Now your connection is added, and Open WebUI has all your models!
Select one from the dropdown menu to get started.
I don’t think anyone could argue that a model small enough to run on a single GPU would be as good as Anthropic’s Claude models when it comes to coding assistants. But the Chinese open-weight models keep getting better and faster, so who knows!
The Qwen family of models from Alibaba is one example, so let’s try
it out. SSH into your GPU droplet and pull qwen3-coder:30b,
a mid-sized long-context model that comes in at a svelte 19gb:
$ ollama pull qwen3-coder:30bNext, you’ll have to increase the default context window.
Essentially, coding assistants require a pretty big context window, and
Ollama automatically sets its context window very small. Run the
following to create a version of qwen3-coder:30b with a
larger default context window:
$ ollama create qwen3-coder:30b-32k -f - <<'EOF'
FROM llama3.1:8b
PARAMETER num_ctx 32768
EOF
Then run ollama rm qwen3-coder:30b to remove the
original if you want to clear up your disk space.
I use the Kilo Code extension in VS Code. Once you have it installed, open it from the sidebar, go to the settings, and hit the little “+” next to Configuration Profile, name your new configuration profile (“droplet”), and add the details for your Ollama endpoint:
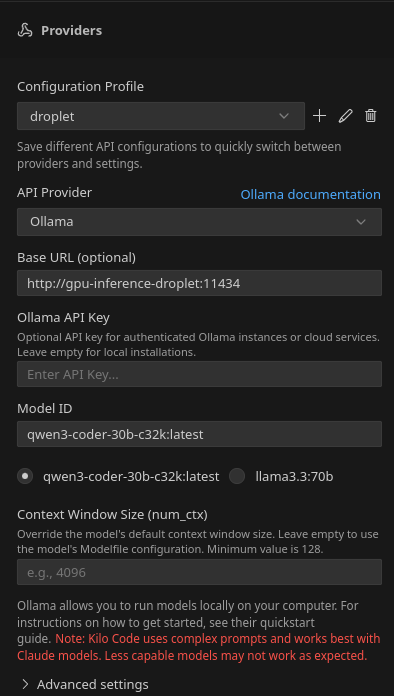
Once the models load, select whichever one you’re using and hit “Save”.
And that’s basically it!
Back in the coding assistant sidebar, select from the little menu
what kind of help you’d like (Architect, Code, Ask, Debug, Orchestrator)
and prompt away. And as always, when you’re done with your coding
session, remember to open your terminal and run
$ doctl compute droplet delete gpu-inference-droplet to
destroy your droplet.
With open-weight models geting better, inference geting faster and more efficient, and new AI-related breakthroughs happening all the time, my expectation is that local inference will become more viable, especially as LLM technology matures and people have a better idea what they actual want from it.
Who knows, maybe someday we’ll all have our own AI boxes at home! For now though, renting a GPU offers an accessible option for people who just use it once in awhile, or who want to try out local inference before they invest in expensive equipment.
If you have any questions or need to get in touch, you can always contact me on Mastodon or LinkedIn. Hope this helps someone!